Welcome to another 12 months of interesting times

2017 has started, and despite 2016 being memorable for lots of wrong reasons, I had barely got used to it!

Happy New Year dear reader, and I hope this year turns out better for all of us.  My main goal is not to not break any major bones resulting in a 12 week hiatus on most things – but particuarly crafting.

I did manage, over the Christmas break, to complete a huge project that I had been working on most of the year for a friend.  Of course it came down to the wire and I completely forgot to take photos.  A challenge thrown down on St Stephen’s Day (that’s Boxing Day to most of the UK) resulted in me crocheting a hat in DK weight sequin yarn with a 3.75mm hook in a little over 3 hours.  Of course I also don’t have photos of that either.  I did however manage to take a couple of photos of my ‘plane’ knitting though – and now have a lovely pair of alpaca/wool close fitting fingerless gloves.

snuggly fingers

The pattern is Easy Peasy Fingerless Mitts by Make Something Special and whips up in no time (relatively)  – I’m not the world’s fastest knitter by any stretch of the imagination, and these took me about 5 hours all in.

So, first post of the year, and the usual promises and resolutions loom on the horizon.  I’ve got lots to share with you, and big plans.  Some of my break was spent with lots of sheets of paper writing down lots of ideas and plans and resolving them down into something feasible.

The first resolution involves this blog.  I’m a perfectionist which results in me not doing anything until it’s perfect in my head, beautifully presented, hundreds of photographs, witty and insightful, and preferably topical… which realistically is never going to happen.  I’ve accepted that and so have the idea for a series of small ‘update’ posts that should (hopefully) mean that I post more regularly.  I’ve even got a ‘theme’ plan for regular posts on a monthly basis which broadens the original spec of the ‘crafting’ blog, but frankly I am more than just the crafting in my life – which admittedly is a large and important part, but not the only part!

The second resolution is after the confidence boost and publication of the Manchester Shawl last year I have promised to publish at least 4 more patterns this year.  That involves quite a lot of work so fingers crossed.

Of course there are several other non-craft related resolutions – the usual ‘lose weight’, ‘improve my second language (French)’, watch less telly, don’t get blown up by Trump…. stuff.

Right, I’m posting this, imperfections and all, and moving on to working off some of the weight I’ve gained over the celebration period and the 3 months before when I couldn’t cycle to work due to a broken elbow.  I’ll let you know how it went very soon!

So, what are your resolutions for this year?

manchester shawl update

I am completely overwhelmed by the response to the publication of the Manchester Shawl a couple of weeks ago.  Thank you to everyone who had purchased and given me very positive feedback.  This has been a MASSIVE confidence boost to me and I am now looking at ways I can make 2017 my year of designing and publishing.  I have lots of shawls made that I need to write up, and design ideas that I need to work through!

At the moment I’m working on a Tunisian shawl design.  I had looked for a shawl that had certain elements and found lots of shawls that were *nearly* right but nothing that was *exactly* right.  So decided to make my own.  After lots of false starts and ‘almost’ rights (I like this, and this but not that….) I think I finally have a combination that is working so that is finally coming alongTunisian Under Wraps

I’m loving the yarn though.

Talking of yarn I’ve decided that I need to pull out the Stash and reorganise it all (again).  I need to order some boxes for it and dedicate a day to putting it all on the floor and then back into some better order.  At the moment I have two large boxes (and several smaller ones.  And maybe a couple of drawers.  And my ‘current project bags’……oh dear) which is ‘sorted’ into UNDER 4ply and OVER 4ply.

As much as I love those beautiful photos of rainbow cascading yarn cakes, it just isn’t practical with my life and I really don’t need to split by colour group or fibre – it’s not that kind of stash.  Frankly if I sorted my stash into ‘yarn with silk’ I’d have one huge pile and a couple of balls of cotton.  So I’m thinking a box per yarn weight/WPI so when I decide next year to design something in DK or 4ply or cobweb I can just pull out that box for a play and inspiration.

Does anybody else do this?  Have a system for something for years and then suddenly one day realise it’s not working anymore?

I don’t have a free weekend until October – but watch out for a photo update!


Perfect Weekend Sweater

Last October I went to the Knit and Stitch show at Alexandra Palace and scored 10 skeins of Artesano cotton for £30.

I wanted a ‘throw on’ weekend sweater for an upcoming holiday and the cotton was lying there looking at me.  A search of drops gave me a base pattern and after some modifications I ended up with…

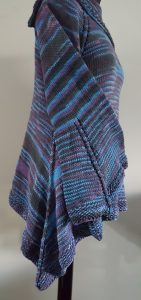
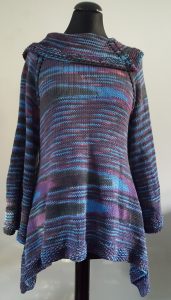
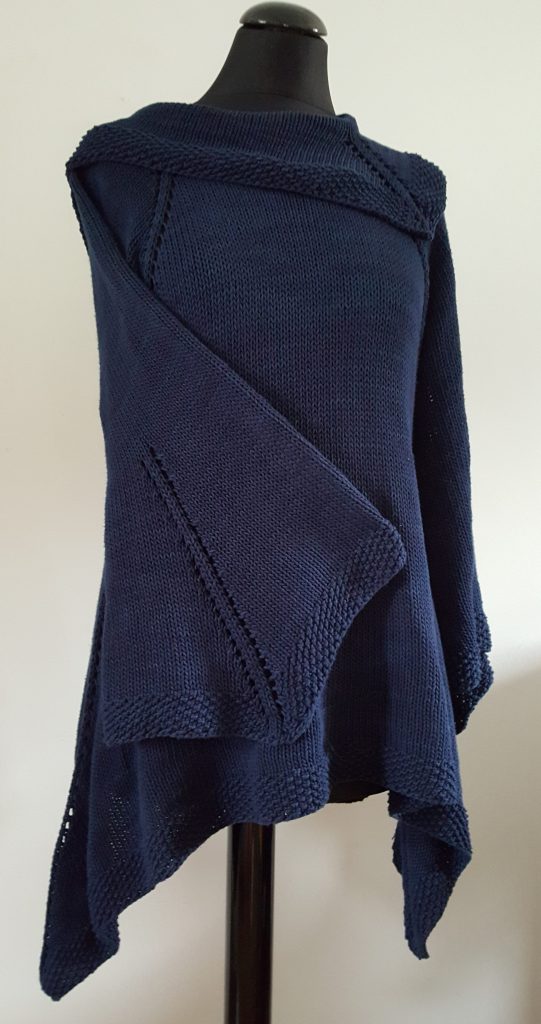
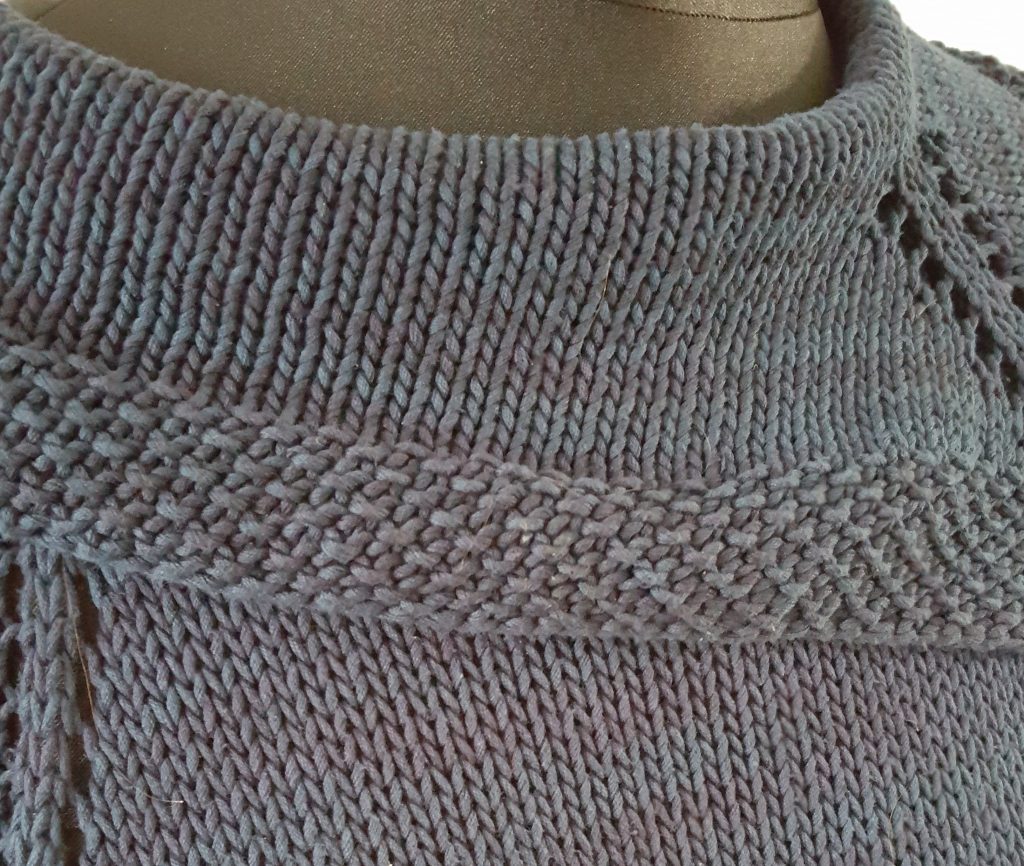
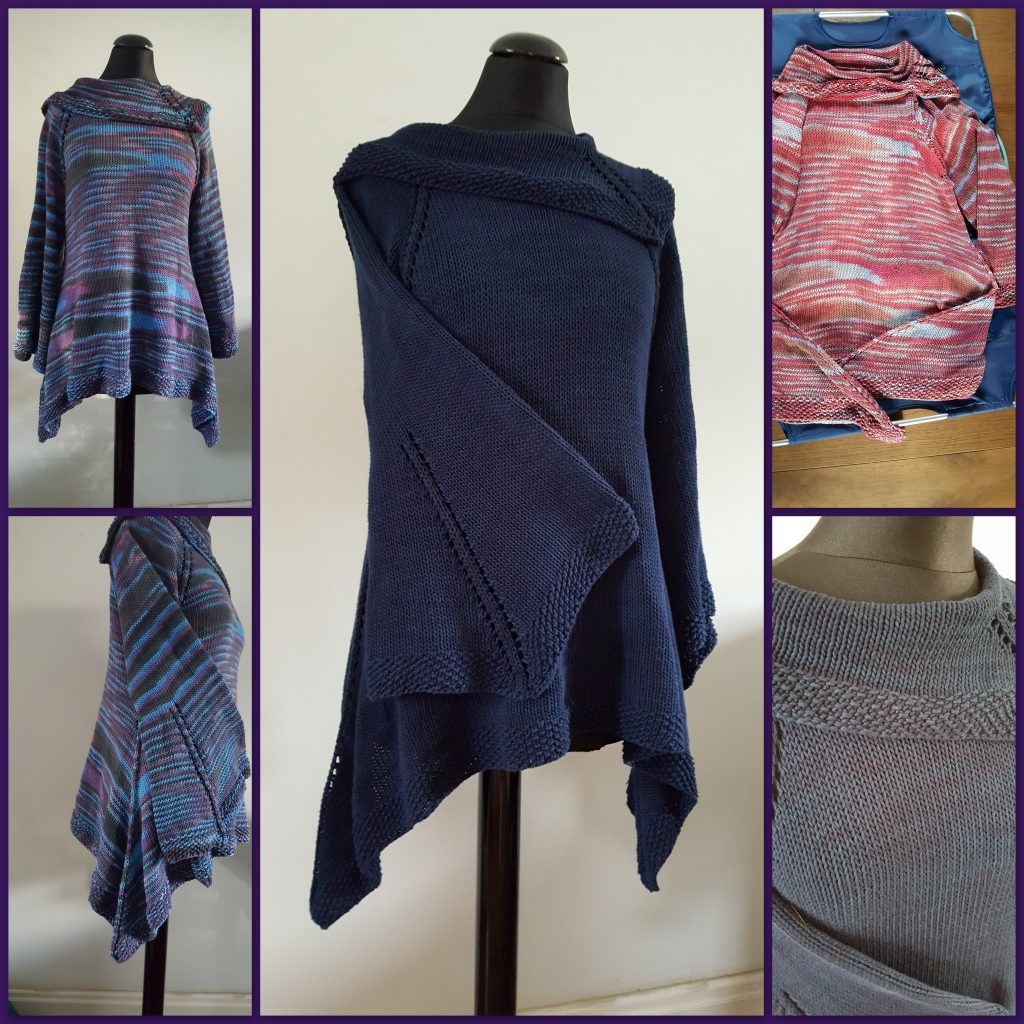
cotton sweater side viewcotton sweater  front viewI adjusted the waist shaping and hem, added a moss stitch edging, added the same shaping to the sleeves and added the collar.

However, my crafting friends really weren’t convinced by the pooling. Most objecting to the ‘fingers’ over the bust line and hips, other objecting to the change between the bust, waist (where there are no increases) and hem.

I’ll be honest it didn’t bother me, but I wasn’t massively attached to the result so decided to try something I hadn’t done before, but for which cotton was perfectly suited.  Overdying.

Now, I’ve dyed other things in the past – garments that needed refreshing, tablecloths to match the wall paint etc… but these were all fabric and I hadn’t dyed something I had made before, and I definitely hadn’t bleached something deliberately before.  The internet was surprisingly unforthcoming about the best bleach and amounts to use.  I settled on Cillit Bang Bleach and Hygiene (it’s a purple bottle and picked up mine at Wilkinsons).  I ran a couple of inches of water into my bath (enough to cover the sweater just about) and added 100 squirts of the bleach.  After an hour, with the occasional swirl and turning over after 30 minutes I had this…

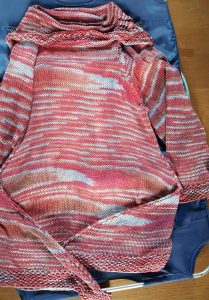
cotton sweater bleachedIt *really* didn’t bleach out the way I expected it to.  For some reason I wasn’t expecting pinks!

After that it was a simple case of throwing it into the washing machine with a 500g packet of Dylon machine die in French Navy.  A cycle later and I had this…

cotton sweater dyedand I LOVE it.

While the picture above looks like a solid hue, it really isn’t – there is beautiful, subtle tonal shifts throughout the sweater that show up in different lights.  I took a photo with flash to try and show this, so while the colour is (very) washed out – this does give an idea of the tonal changes…20160814_085716All in all I love it – I’ve had several comments on it while wearing it (including being asked if I frogged the original jumper) and it was a really interesting process.

I have worn it A LOT since I finished it (in fact I’m wearing it today).  For £30 (well less, I still have 4 skeins left) and the cost of the bleach/dye I am delighted.

cotton-sweater finished

Have you ever dyed anything?

Reflecting on improvement

As regular readers to this blog may have worked out I have a touch of a type A personality – and as I get older it gets more obvious.  In my crafting life I constantly strive to improve, searching out different ways of doing things, modifying materials, patterns and techniques to get the result I want.

But it’s not just crafting – Mr TuesdayFortnite will happily tell you of the time there were 32 different swatches of ‘grey’ on the front room wall as I took two weeks to decide exactly *which* grey to paint the whole room.  I recently had to change channels when a make-over show hung pictures on the wall *crooked*! (shudder).

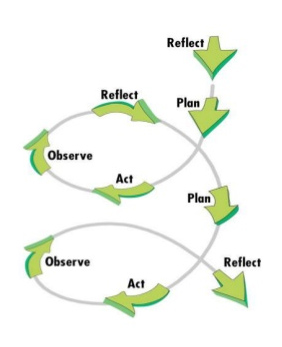
This perfectionism extends to my teaching as well – whether I’m teaching dance (my professional training), MS Word to work colleagues or my crafting classes.  After every teaching session, designing a pattern, rearranging a room (or my stash!)…. I sit and reflect and review on what went well, what can be improved and how I can be better.action-reflection cycle

We did the Crochet Beginners class on Saturday last week, and it went really well – with everyone producing lovely work and starting on their individual crochet adventures.

Sometimes the best ideas start with ‘why?’ and sitting in the car on the way home I had one of those moments – I wrote the course way back in 2011 taking notes from other crochet teachers at the time on how to structure a class.  Being new at teaching crochet I accepted the wisdom of my ‘elders and betters’ on the circuit – and didn’t question it.  But why?reflective process

Here, 5 years on, I have the knowledge and the confidence to question that structure – and I’ve broken down what we do on the classes and am starting again from scratch – no assumptions on ‘that’s how it’s done’ or taking ‘because that’s how it is’ as an answer.  Exciting times!


projects update…

ICE has finally thawed and finished and while I initially wasn’t convinced (I’ll be honest!) I have found myself wearing it a lot the last few days.  It’s a lovely wearable shape, and the colour I’ve chosen goes with a lot of things!

I think the pattern as written has the sleeve a little short – but that could me having a *much* tighter gauge than the designer (though my swatch came out right).

Of course it was also a good opportunity to practice my continental style knitting.  I like the knit stitch and will use that again, but I’m really not a fan of Norwegian purl.  It might make more sense if doing rib stitches, but for doing stockingette it makes no sense at all!

I also picked up and finished two (yes TWO!) little crochet projects.  After procrastinating for a long time (as regular readers will know I have ideas and then they have to ‘simmer’ for a while) I finally opened my copy of Mary Korinor’s Crochet Lace and did two projects.

One is a baby blanket for a work colleague and the other is a stash busting shawl using up 5 balls of kid silk haze “acquired” at a swap meet.

baby blanket and haze shawl

baby blanket and haze shawl

Mary has a very interesting approach to her work – including the all important “how much to leave for the border” calculations.  Of course Mary was English, and I have made several “design features” out of the fact that I frequently forgot this and mixed up which stitch I was supposed to be doing.  I find Mary fascinating in that often she will describe in words the stitches for the centre and inner borders and then give just a chart for the outer/edging border.  I found this approach very interesting as charts for the middle section would be very useful, and if you can’t read charts then you can’t finish the project.

I’m really pleased with how both projects have turned out, and am tempted to just go ahead and do the other shawls in the book out of curiosity – in particular the two ‘granny square’ based shawls as mine are both over 20 years old and starting to look a little tired.

I really enjoyed the kid silk project, and am now playing with some stitch variations to work out how to make a capelet shape that hugs the shoulders with a beaded edge.  I might even be able to make it a one skein (or two at most) project.  I need to dig through my stash and find my fyberspates faerywings as I think it would be particularly gorgeous in that.

I’m about to come  to the end of my current contract and have a few weeks while I job hunt.  During that time I plan to write up some of my patterns and publish them –  so watch this space!


It’s going to take just a little bit longer…

I find, in my experience, that you only have to think “oh, this will be finished soon” for an entire project to suddenly go ankle over elbow.  A more assured curse is the “I’ll be able to wear this on….”

I made the mistake of thinking BOTH these exact thoughts last Thursday as I completed the last round of the cuff of my ICE shrug – just the (ok, uber long but crochet) middle edging to do, two and a half hours commute craft time, plus a long drive on Sunday morning (with me being passenger) so I’d be able to block Sunday evening and wear this on Wednesday!

At which point a small wormhole opened and sucked that reality into an alternate dimension.

“Trying it on” for the benefit of some work colleagues for who a shrug is a new and novel concept (let alone making one) I decided that the sleeves were a bit short.  The edge of the cuff sat on my elbows, so the bottom edge sat half way down my forearm.  It just looked small.

I had got gauge on my knitting (if anything a little loose!) and I had done the right number of rows.

No problem, I’ll just take out the second cuff, undo the bind off, pick up the stitches and knit another 6” onto the body.  Fine.  It won’t add that long to the job.  I’ll still be finished for Friday.

Ha!

I unravelled and unpicked and picked and knit.  4” in I had a look and realised that somehow my tension had become more relaxed.  MUCH more relaxed.  Suddenly I had a piece of knitting with something approaching a fishing net attached to one end.  This thing suddenly looked like I had handed it to my 3 year old niece for knitting practice.

That’s ok, I thought I can just work the extra yarn out of each stitch and feed it up though the knitting row by row until it comes out at the top.

Those of you who are “good” knitters will know what a stupid idea that was.

20 minutes and 1 row later I had an extra 18 inches of yarn sticking out one side of my project (see told you my gauge had got really loose) and I had come to a rather interesting conclusion.  It was going to be faster to rip it out and re-knit that section.

So my commute craft time this morning was spent frogging and picking up stitches.  Again.  I have six inches of knitting to do, then the cuff and then the middle edging.  Not going to be done by Friday.

Completed Projects – sometimes, it takes time!

So, first up, I promised photographs of the Garland sweater…

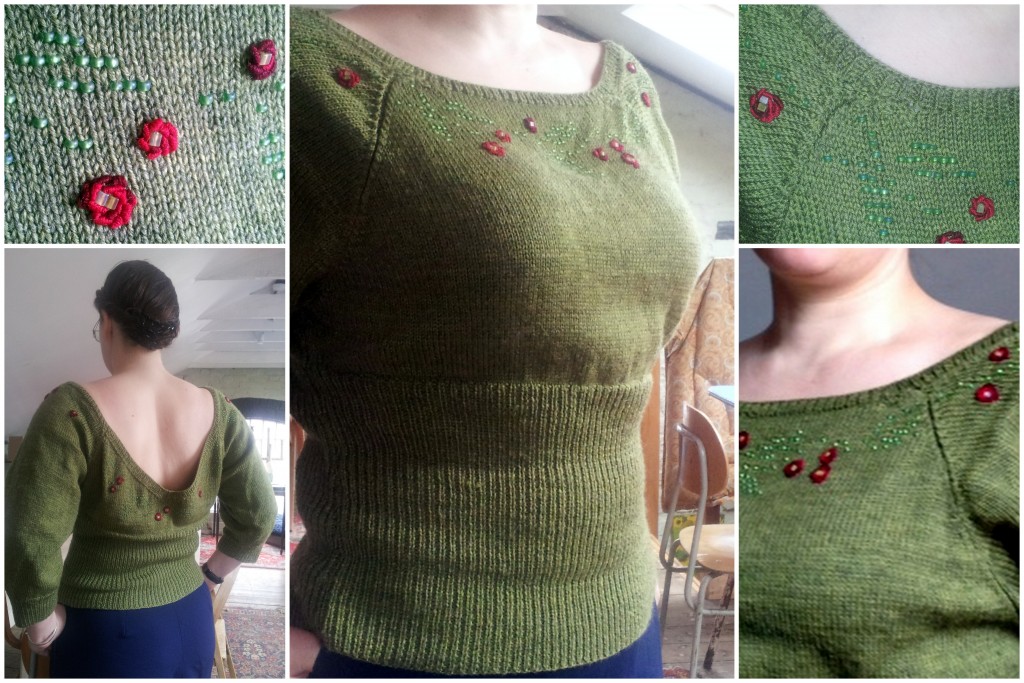
The complete sweater - the image top right is probably closest to the true colour of the yarn.

The complete sweater – the image top right is probably closest to the true colour of the yarn.

I had fun doing this sweater – and you can see in the bottom left photo how the top is a little baggy in the back, as I mentioned last week.  Though we have discovered that if I have less than perfect posture that ‘bagging’ vanishes!

At the recent Purlescence open day I also bought some beautiful buttons and some French Navy pure wool sweater yarn to finish the 1963 Twinset.

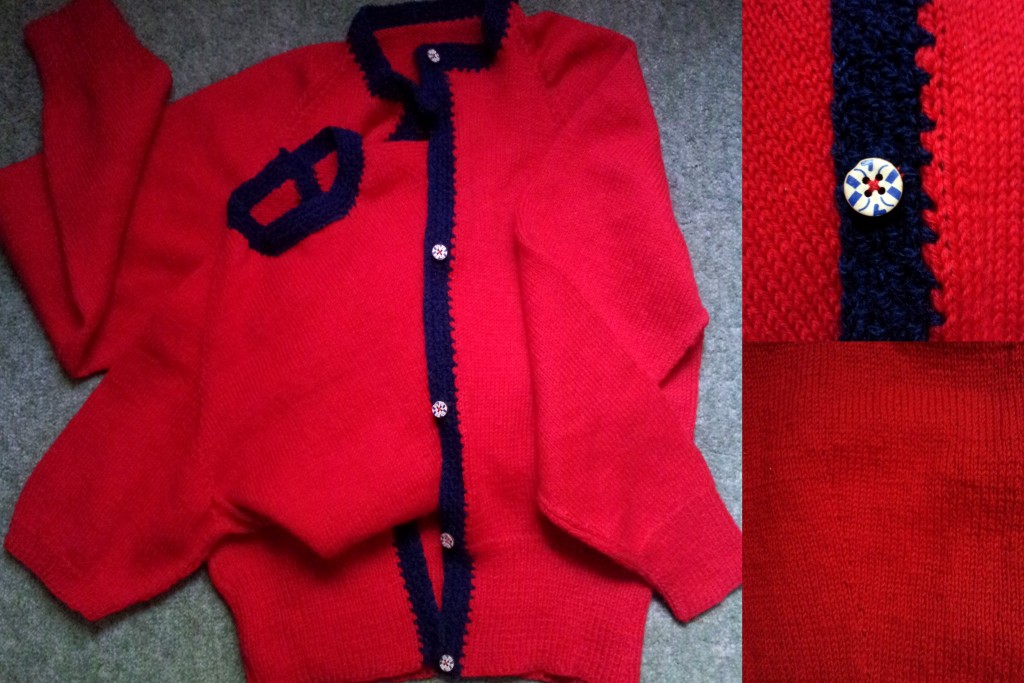
The 1963 Twinset (you can just see the dart in the bottom right picture)

The 1963 Twinset (you can just see the dart in the bottom right picture)

For those of you who don’t know the story of the 1963 Twinset, pull up a chair and get comfortable.  A friend of mine turned to me about three years ago, and (knowing my interest in vintage) asked if I would be interested in finishing a project.

It turned out that a friend of hers  – a wonderful older lady with a name at least at interesting as my real name had started knitting a twinset and had never got around to completing it.  The pattern she had used was a 1957 pattern, and she had started knitting this twinset in 1963.

Now, before you think this wonderful lady is an incredibly slow knitter, that’s not the case.  She ran out of yarn for the placket and collar and put the project aside in early 1964, from whence it made it’s way into the attic and there it had remained until three years ago when it was handed to me.

This twinset is a work of art, the tiny stitches are so even the effect is almost of a machine knit.  The darts on the top are almost invisible to the human eye.  I can’t find any ends where the balls change over – just the cast on and bind off tails… and the whole thing is knit in the most amazing pillar box red.

It’s this red that created my challenge.  There was no way I was ever going to match this shade of red (in fact the original knitter had tried and failed – hence it’s long purgatory) so I was in a quandary as to what to do?

First up the wonderful Susan Crawford started her vintage line of yarn – Aha! (thought I) – but no, none of the shades were quite right (though I did indeed buy some and knit the January sweater with Excelena, and what lovely yarn it is to)

The 1963 twinset sat in it’s box while the problem sat in the back of my head.  Pondering.  When I heard that Purlescence were now stocking Jamieson & Smith 2ply pure wool I knew I had potentially struck gold.  The next open day I could make I took the 1963 twinset with me and spent a few hours on the floor with each of the 40 shades – too brown, too orange, too ‘Christmas’….  There were some surprising combinations that worked (burnt orange and bright red anyone?) but that weren’t in keeping with the period and there were several combinations that should have worked but didn’t (red and black?! why wouldn’t red and black work?).  The moment we paired the French Navy magic happened.  If my life had been a Disney movie there would have been singing birds, delighted squirrels and sparkle dust.

Serendipitously, Textile Garden were also there with their lovely buttons.  lots of hunting and coo-ing (and extraneous buttons that I didn’t really need later) I had 10 lovely little cream buttons with a vintage navy blue abstract design on them.

So now I had yarn and I had buttons and I had a vintage twinset that I was terrified of ruining.

That night I had a dream.  Literally, I really, honestly, did!  You’re worried about knitting on a placket and collar and it looking weird (said my dream).  You’re worried about not matching gauge, and getting it all wobbly or too tight (continued my dream).  Why not crochet an edging? (cue lights going off all over, fireworks and stirring orchestral music).  Indeed?!  Why NOT crochet!  It was actually pretty common to combine the two crafts, and by crocheting the edgings I could make sure it was exactly the right tension as I wouldn’t need to pick up and knit stitches along the edge…

The next morning I added a gravel stitch placket and collar to my lovely twinset.  The next day I added the lovely buttons.  And now all I need to do is give it a rinse in some lovely SOAK to full the new wool a little and refresh the 50 year old yarn.

I have realised I also need to buy a navy pencil skirt or wide-leg 40’s style trousers to wear with this creation, but truly? it’s a small price to pay.  I can not wait to wear this out, and I am so proud of being able to finish this project (which, co-incidentally fits me perfectly) and do the original knitter justice.  I also have plenty of yarn left over – so I’m wondering if I also crochet a detachable collar for the sweater…  hmmmm…..


I finish a spring sweater – just in time for summer!

Garland is a lovely vintage style bateau neckline with deep V back.  It has a beaded trailing vine around the neckline, decorated with bullion knot flowers.  I’ve been working on this sweater since last year, and it’s a lovely ‘spring’ weight jumper – warm but not too warm, too warm for summer and a little too cold for the depths of winter.

Of course the weather last week turned glorious – so much for “neigh cast a clout till May be out”

It is always the way isn’t it, (for me at least) that when doing a project that requires a specific amount of yarn  the final ball goes walk about?  I know the 5th ball of yarn for finishing the ‘Garland’ sweater is somewhere in the house, but despite my best efforts I am unable to locate it.   Needing to do a final 4 rows on the neck, I finally gave up turning out cupboards, boxes and bags and ordered a single ball (from LoveKnitting as my original supplier, Black Sheep Yarns, had run dry).  Two days later (very quick, as I ordered on a Sunday evening and my yarn arrived Tuesday lunch) and cosseted in a very pretty little project bag with LoveKnitting ribbon my lonely little ball arrived and I got to pick up the stitches for my neckline.

The MIA ball will of course suddenly appear in the spoon drawer or something –  The sweater however is finished, and I’m really pleased with my little silk embroidery thread bullion knot flowers (it works much better in my red than the pattern original white in my opinion)

I know, I know – photos to follow!

I know I was on gauge for the project, and I have ‘blocked’ it by the process of getting the thing sopping wet, squeezing it out (deliberately) fairly roughly and laying on the sweater dryer.  However on wearing, the sweater thinks I am a few inches bigger than I actually am.  Particularly in the old bosom area.  While gratifying, it does mean I have a sweater that is too big.  Not “around the knees” too big, but definitely too big.  Not sure what to do about this to be honest.  I’m going to have to ‘pin’ the sweater to my bra straps – in the time honoured vintage way, not a big deal, but there is about 4” of extra fabric in the back which I really don’t know what to do with.

Wore the new sweater on Saturday to the Open Day at my favourite “local” yarn store, Purlescence and got several compliments on it, so pleased over all for my second sweater (for me, I think this is actually the fifth sweater I have made) – the seaming is certainly a cut above my previous attempts! Next, I’m hankering after a sweater done entirely in 2×2 rib – though my interest levels and my fingers aren’t looking forward to the actual mechanics of having to stitch it. I have a couple of patterns in mind, and the yarn is sitting ready, so it’s just a case of making the decision.

What else am I carrying around in my bag at the moment?

The continuing long commute means I have crept forwards on the Tirrold – but it really does feel like I have crept forwards.  By my calculations another 10 hours will have me at the end of the 120ish rows needed to complete the rib section but when each minute on this feels like an hour,  it really feels like it is taking forever!

I’ve also started work on ICE, a lovely summery bolero/shrug that I am working in a dark denim blue cotton.  Worked on HUGE 7mm needles (in comparison to the 2.75mm for the Tirrold at least) I’m taking the opportunity to practice my ‘picking’ skills – using continental knit and Norwegian purl techniques.

So far I’m not convinced by the purl stitch, I still prefer the Portuguese style of purling for speed and consistency – however I am starting to be at least competent in the Continental knit method and slowly picking up speed.  And it’s not going to take me 10 hours to do the required 120ish rows of stockingette either.  Making it my current ‘go to’ commuting project.

More on the projects I’m working on next…

Chart Reading 101 pages and a long commute

Well, after (literally) years of promising I finally got around to putting up part 3 of the chart reading tutorial as web-pages as well as PDFs.  I split the PDF into two sections, and reworked (slightly) the second part about reading chart only instructions (for example those pesky Japanese charts).  The PDF is still the original version so the wording and charts are very slightly different.

While this is definitely the most visited section of this little website, if you haven’t come across these tutorials before there’s a bit more info below:

Part 1 – getting started, what those funny symbols means and working out what you are supposed to do with them.  You’ll need a hook and a bit of spare yarn as we’re going to make a small sample together.

Part 2 – continuing where part 1 left off, getting further in our sample.

Part 3a – which covers finishing the test swatch and working out how to change the size of your pattern here. (note: it is the same PDF for Part 3a and 3b)

Part 3b – which deals with chart only / foreign language charts here  (note: it is the same PDF for Part 3a and 3b)

Part 4 is coming soon and deals with working in the round.

In other news, this week I started a new job.  The commute is a bit of a killer though with an hour and a half each way.  On the positive side this means plenty of time to get some knitting done.

Invariably I am squished up against somebody else, being thrown around corners and getting a variety of drivers who have little faith in the brakes of the vehicle, ramming their feet into the floor Flintstone style and then being surprised when everybody on the bus is flung forwards at the window.   This means that delicate lace charts probably aren’t going to be my project of choice.  However, the 2×2 eternal ribbing of the Tirrold is perfect.  I get about 2 1/2 rows done (before swapping out to catch up on my reading) – and those 5 rows are day are slowly adding up (remember this one is in cobweb weight!)

I think I’ve added another 1″ (ish) this week.  I need to count the rows though, and the pattern (much as I love Jenni and Fyberspates) has one of the most useless gauge instructions I think I’ve ever had:

Repeat last round 117 more times.
When firmly stretched out rib should measure 21 cm”

Now the tension instructions read: Relaxed after firm blocking 29sts and 49 rounds to 10cm

So – how firmly am I stretching?  To the limit of the ribbing?  why don’t we have a “or about x cm unstretched”  Have you tried counting rows in cobweb weight yarn?

I get the feeling I’m going to be doing this for a while longer.  I’m currently at 21cm unstretched.

I’ve also started ICE in a denim blue cotton (there’s really not enough to photograph yet).  I’m mentioning that project here as I’m trying to work it in continental style in order to practice picking (being a natural thrower).  The knit stitches I’ve kind got down.  I’m not really enjoying it yet (my left index finger gets quite sore from the tip of the right needle rubbing it – anybody got any tips?) but I can see how the knits would be faster.  For the purl rows I’m tending to find myself using the Norwegian style, but it feels clunky and long-winded with lots of extra, unnecessary movement.  However, “proper” continental purl with the yarn in front drives me mad as I can’t get the yarn to stay wrapped around the needle tip.

Long story short: I’m enjoying the pick method of knitting, but want to use Portuguese style for purling.

More research needed on the different methods of purling continental I think.

So, light on the images this week – sorry.  Hopefully I’ll have some photos for you next week of a progressed Tirrold and an ‘assembly pack’ of Garland as I have about 20 beaded rows to do on the final sleeve before I can start sewing it together.

Zooming Along

Two posts within a week?!  What is going on?

Well I promised you an updated on the Zoom Loom I told you I had purchased with my Birthday money (because, as I’ve already said I am fundamentally 6 years old).  I’ve had chance to have a play and I can honestly say it is fun.

woven blanket

woven blanket

I’ve ended up with a ‘summer weight’ baby blanket – which is perfect as an acquaintance is about to have her first child.

Each square is 4″ (unsurprising really given it’s a 4″ loom) and takes about 9 yards of yarn (depending exactly on what fibre you are using – I was using a bit less for the acrylic above, and a bit more for the 100% cotton I tried) and after a bit of practice it does indeed take about 15 minutes to create a square.  The blanket is 30 squares (5 x 6) and a border ending up 24″ by 28″.

A  single squareThe drape and handle of each square is lovely, particularly on the cotton yarn I did a couple of test squares with and I’m really quite looking forward to trying it with two different yarns – or a variegated yarn – to see what colour “stuff” happens.  I may have some lust for the shawl sized triangle looms I’ve seen around on Google.  Lust that will never be requited, but still one can dream

The only thing I’m not overwhelmed by is the process of joining the squares together.  Using the suggested “whip stitch” method looks a bit untidy to my eye (particularly at the junctions and corners) and a single crochet ridge won’t work either.  There are suggestions in various places of crochet inserts and other sewing methods so I think I need to try some of those.

However I do think there will be more of these little squares in my future…